I posted about three weeks ago about my Hexbeam failing again and you can read that by scrolling down the page a little or by clicking here. I spoke to the manufacturer directly after and he sent me a set of his new custom made PTFE spacers. There was a contest the following weekend so I managed to get the mast down and replace the spacers on the broken element in time. I didn’t do any other elements as it started to snow!
When I lowered the mast, this is what I found (click for full size version).
Not only had the end next to the driven element burned out but the other end of the cord had disconnected from the spacer and I found it on the floor under the mast. It was a major failure.
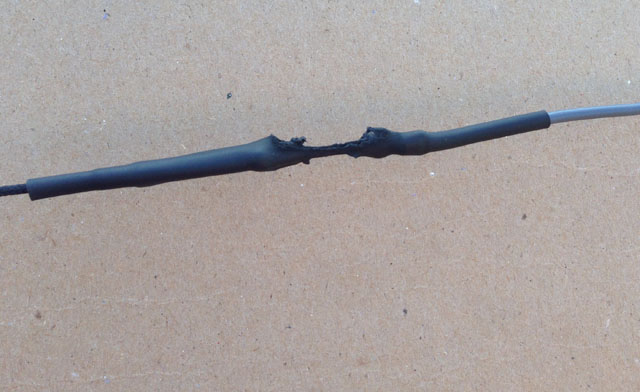
Today is the first day that there’s been really favourable weather and so I was able to replace the insulators and cords on all the other elements. It’s the EA RTTY contest this weekend and I’m hoping to make a single band 20m entry. It’s a good job I did the aerial work today as the 20m element was on the verge of failure. I don’t know exactly when this happened but I don’t think it would have lasted much longer because as you can see, the cord has completely burned through and it was hanging on the heatshrink.
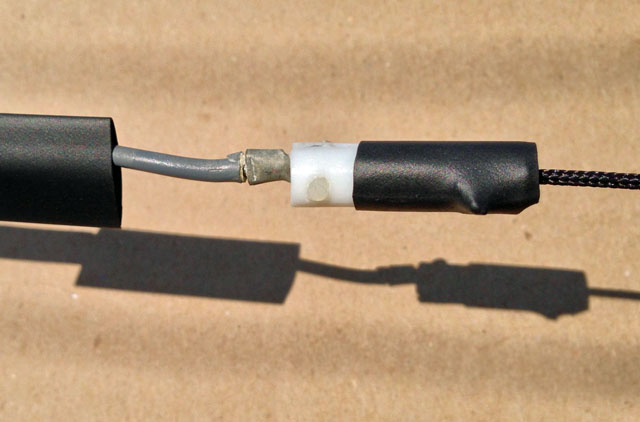
The latest modification is a bit sturdier than before. Each piece of wire, driven element or reflector has a terminal ring on the end. Previously a piece of cord was fed through that ring and heatshrinked in place. Now the ring goes into a PTFE spacer and heatshrink is applied to keep it all together. Here’s an element in place with the heatshrink ready to go on.
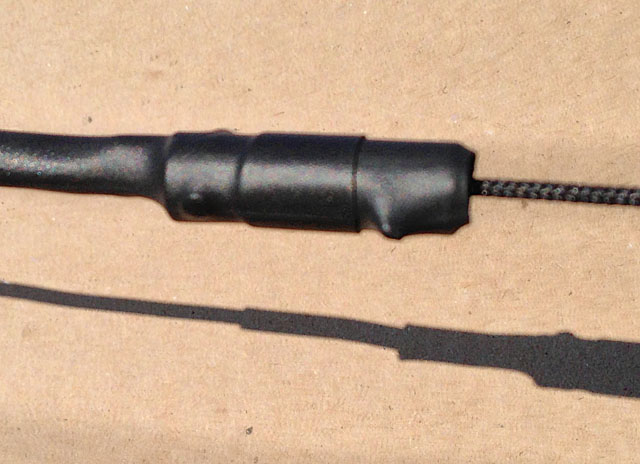
The heatshrink is pushed up over the PTFE and shrunk into place (blurry pic, it’s really quite difficult to focus on these elements in situ, hence the brown cardboard background).
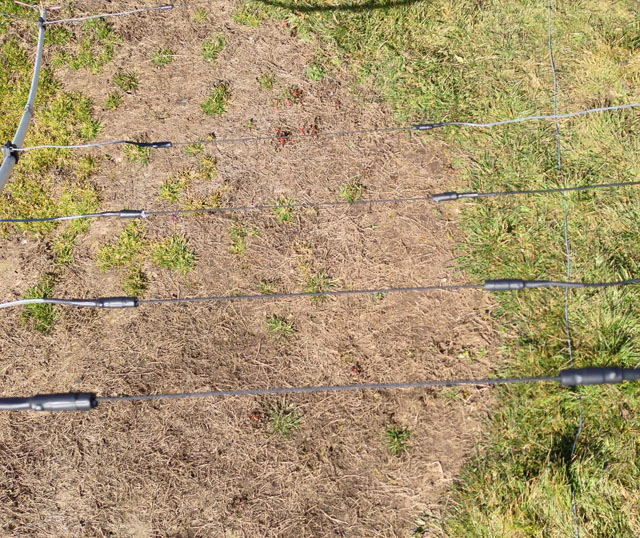
And finally here’s the 17m, 15m, 12m and 10m elements all modified, you can just see a small part of the 20m element at the top of the picture.
I don’t know for sure if the problem is fixed, only time will tell. I like the Hexbeam design a lot but I’m not a great fan of the way it’s kept failing on me. However the customer support from the manufacturer has been fantastic all the way through and I can’t fault that.


